Kids art frame
Kids art frame
A frame with backlighting to showcase my kids' artwork.
/filters:strip_exif()/filters:strip_icc()/filters:blur(4)/96/2ZQCVeZ2zuQALqbGpb7yFKhITbWbMRzvmgwmQOXZ.jpg)
I love it when my kids create art, and nearly every wall in our home displays some of their paintings or drawings. Occasionally, we replace them with new ones. However, I wanted something more elegant, where their artwork could truly shine. Framing them is a nice option, but I wanted them to be more prominently featured, something that would instantly catch the eye. And it had to be easy to swap them out for new drawings.
In my woordworking class, we practiced creating various types of connections. Later on, we were tasked with designing a project where we would apply one or more joint techniques. That's when I had the idea to make some kind of light box to display the drawings of my kids.
To make the light box I used the following:
4 wood sides
1 clear acrylic panel
1 milky white acrylic panel
1 back panel
LED strip
DC connector
A sheet of foam board
A sheet of white card stock
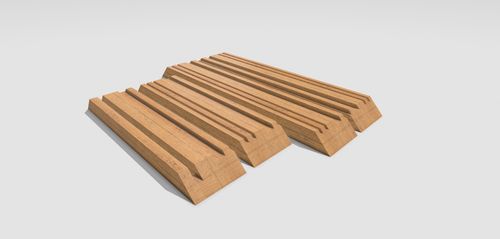
To construct the frame, I cut four pieces that will be joined with mitre joints. I ensured that the size was calculated to accommodate an A4 paper when considering the inner width of the frame.

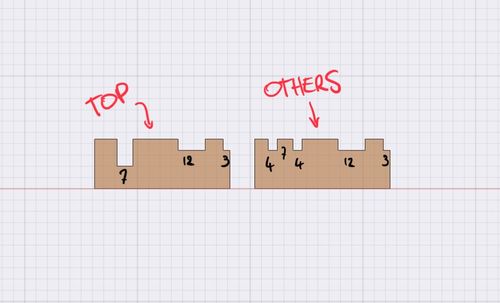
The left, right and bottom all have the same cut profile. The top is a bit different

The left, right and bottom each have 4 grooves, those where made with a table saw.
The front groove is for the clear acrylic or glass panel (4mm)
The second is for the milky panel, this one is used to diffuse the LED light (4mm)
The third, which is the biggest one, is where the LED strip is inserted in (12mm)
And the last one in the back is to attach a back panel to close it (3mm)
For the top we need 3 grooves and one of the grooves extends all the way trough.
Front (7mm)
The LED groove (12mm)
and the one for the back panel (3mm)
To cut out the slot I first used a drill to make some holes, after that I used my router table to cut the full slot and finally I used a sizzle to clean-up the corners.
Before glueing everything together, I drilled a hole in the LED groove on the bottom side. This one is used for a DC connector.
I made the choice to secure the acrylic panels in the frame to prevent any movement or accidental removal when changing drawings. Although I am not sure if I will regret this later. Because of that I had to sand all pieces before I added the acrylic panels or they would accumulate too much wood dust due to static electricity.
With all the sanding and assembly complete, it is now time to apply glue to all the joints and wait for it to dry. Once the glue has dried, I used oil to finish the wood and installed the LED lights. The LED strip is soldered to the DC connector and secured onto the wood using hot glue.
To secure the back panel to the frame, I utilized a few small screws to allow for easy removal in case I need to replace the LED strip.
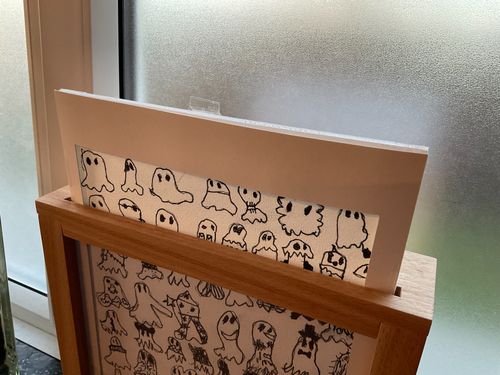
The drawing is placed between the foam board and the card stock, forming a sandwich. Using a hobby knife, I cut out a rectangle from both sheets. I then taped them together to create a "bag" where I can easily slide the drawing in. To facilitate removal, I attached a small piece of tape on top of the foam board, which can be used as a handle to pull out the drawing bag.

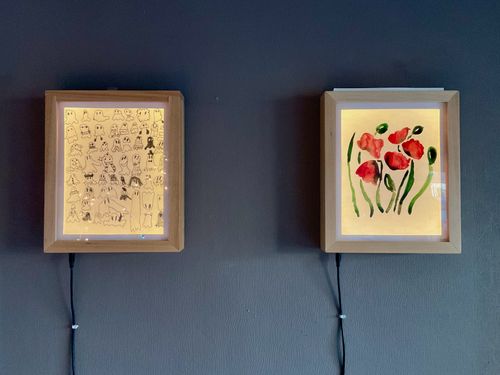
And now, after all the work, it's finally finished. It's time to add a beautiful artwork and hang it on the wall. By the way, I made two of them.
