Maslow 4 marker adapter
Maslow 4 marker adapter
A 3D printed marker adapter for the Maslow 4 to mark out the contours of your CNC project or use the Maslow 4 as a huge plotter.
/filters:strip_exif()/filters:strip_icc()/filters:blur(4)/141/D2WcMvstdO8DPSMeYnJTc0seIj8xYpPqvrqhUnQs.jpg)
I recently acquired the Maslow 4. The Maslow 4 is an affordable CNC machine. Essentially, it’s a hand router fixed onto a sled that connects to a frame with four belts.
Given the limited space in my workshop, I had been eyeing this machine for some time. Its unique feature allows you to construct a sizeable frame either horizontally or vertically and conveniently detach the machine for storage when not in use, requiring less space compared to a typical CNC setup. While I had pondered over purchasing it, my decision paid off when I discovered a year ago that they were planning to launch a Kickstarter campaign with a completely new version.
While I was waiting for the machine to arrive, I had enough time to work out how I could use my limited space to have a frame which I could move out of the way when not in use. Not so long after finishing the frame I received my Maslow 4. It was delivered as a kit so the first exciting job was get everything together. The kit is very well designed so putting everything together was relatively easy.
But after putting everything together I came to the realisation that I had absolutely no idea how to operate a CNC :D
I knew what gcode was (from 3D printing) and I have a lot of experience with vector files so designing things was luckily not the big issue. I had no idea how to convert the vector design to gcode and concepts like toolpaths, CAM, plunge rate, ... I had never heard of.
Since I had no prior experience with CNC machining and wanted to avoid wasting wood and bits or potentially harming my new machine, I got the idea to make an adapter for a marker. This approach would allow me to familiarize myself with CNC toolpaths and the various methods of transforming a design into a file suitable for CNC use. Additionally, I could utilize the marker adapter to turn the Maslow 4 into a large-scale plotter.
Initially, I thought about using pencils, but since they shorten over time, I decided to go with markers instead. One of the main challenges was locating a marker that could fit in the tight space between the router and the wood. The area is quite limited, accommodating only a marker that is about 4 to 5 cm long. I usually prefer Sharpies, but they were too large.
There are smaller Sharpies available, but they were still a bit too big. After searching online, I found some affordable alternatives that matched the required size. Because they were so inexpensive, I didn't mind trimming them slightly to make them smaller. I used hot glue to reseal the tops to keep them from drying out.
In my initial experiments, I simply inserted them into the router collet, but the issue was that I couldn't secure them properly. They either dislodged or were pushed too far into the router, which wasn't an effective solution.
So after some tinkering, I created an initial prototype of a modular adapter in Shapr3D.
The design performed very well, and I was pleased with the results. There were a few minor issues I intended to fix to improve its usability. These smaller concerns mainly dealt with tolerances, making them fairly easy to address.
The main problem was that the marker wasn’t going back to its original position after pressing it against the paper. To address this, I opted to redesign it to accommodate a spring. This modification meant that whenever the Z-axis lifted, the marker would be pushed away from the paper.
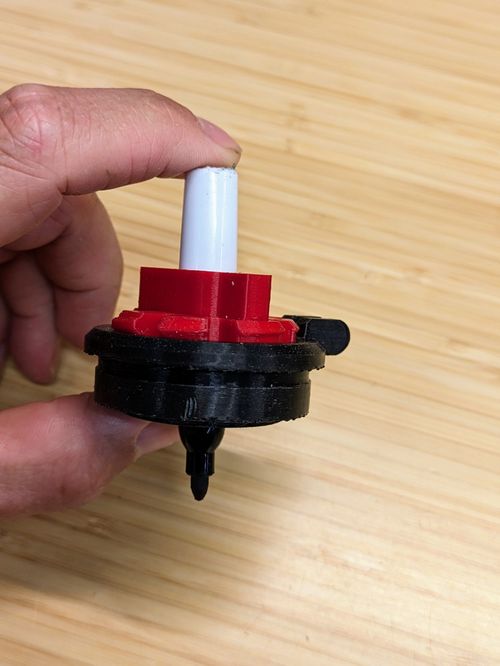
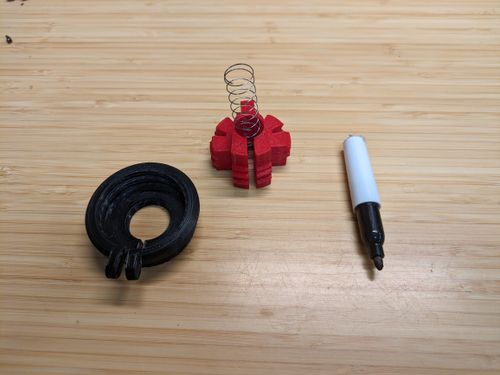
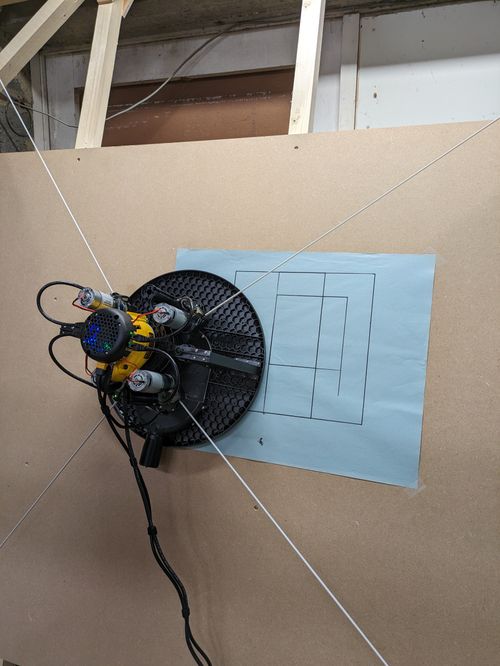
Adding the spring into the design made a big difference and I was getting great results when using it with the Maslow4. The only new issue that I was experiencing was that the spring easily fell out of the adapter. Which was really annoying.
After several additional iterations, I finally found a method to secure the spring within the design. Now I could easily change the adapter and the pencil without worrying about the spring popping out.
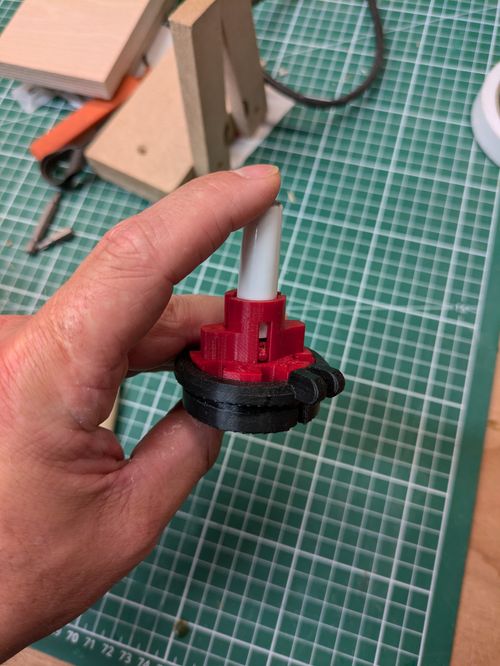
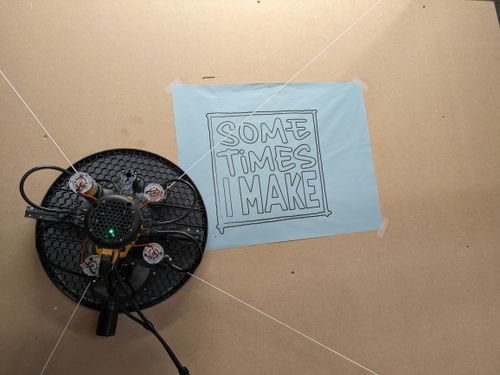
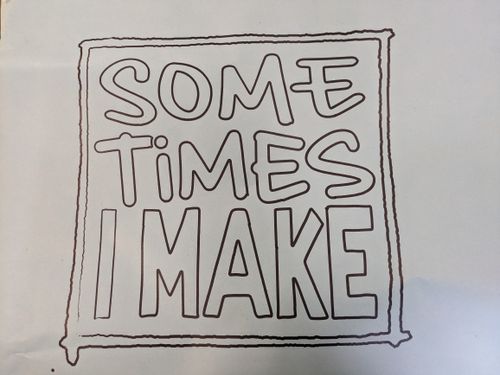
Now I was really satisfied with this design; it still has potential for enhancements and there are other additional issues to tackle, but I’ve decided that this version was complete as it was so I can shift my focus to mastering CNC machine operation ;)
The final marker adapter consists of three components:
A base that secures to the Maslow 4 sled.
A marker holder featuring a spring inside.
A small ring that clamps the marker in place.
The only parts that cannot be 3D printed are the spring and the marker. I purchased mine from AliExpress:
The spring has a diameter of 12mm and a height of 50mm.
https://www.aliexpress.com/item/1005001408323096.html
And these are the markers I use:
https://www.aliexpress.com/item/1005005735072300.html
If you are interested in the full conversation with a lot of great feedback and ideas, on the Maslow forums, follow this link
https://forums.maslowcnc.com/t/maslow-plotter-or-getting-used-to-maslow-without-spoiling-wood/21237
A quick assembly video:
Links

Maslow
We think that the world will be a more exciting and interesting place if everyone has access to the ability to bring big human scale things from the digital world into the physical world. Our goal is to make large format CNC routing accessible.
https://www.maslowcnc.com/
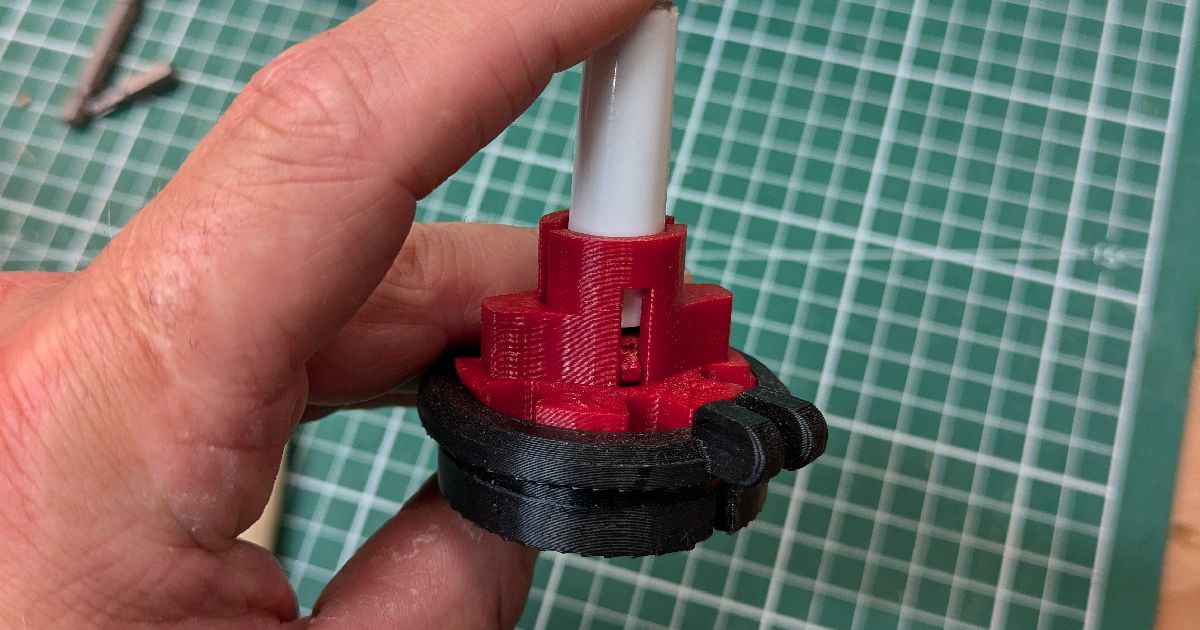
Maslow 4 Marker adapter by marzsman | Download free STL model | Printables.com
I designed this marker adapter for the new Maslow 4 mainly to get used to the machine and the concept of CNC cutting | Download free 3D printable STL models
https://www.printables.com/model/1027470-maslow-4-marker-adapter