QuickReact
QuickReact
QuickReact is a quick reaction game based on the Raspberry Pi Pico, programmed in MicroPython and controlled by a webapp via MQTT.
/filters:strip_exif()/filters:strip_icc()/filters:blur(4)/3/QzHf27FgIwNFYdwRjRvU1KUHnGV1OFCy53wCd9Lq.jpg)
The idea and concept
QuickReact originated from a request by my wife, who works as a personal trainer. There are a few similar products available in the market, and she asked if I could create something alike. My immediate response was, "Of course I can!" 😄
To start, I sketched out some quick designs for the appearance of the pod device and made a list of both hardware and software requirements.
My aim was to Keep It Simple and Stupid (KISS). How difficult could it be? 😅
The pod would require the following components:
A big button
LED lights to indicate the status
maybe sound (nice to have)
a battery
a power switch
A microcontroller
The software requirements were also quite simple.
A central server activates a pod randomly
An LED light on the pod turns on
The user must press the arcade button as quickly as possible
The time between activation and button press is sent back to the server
I'm a huge fan of the Raspberry Pi Pico, which I believe is the ideal microcontroller for this project. It's compact, easy to program with MicroPython, has Wi-Fi connectivity (although no Bluetooth at that time), and can be easily connected to a battery. Sounds perfect to me!
For the button, I wanted something like a large arcade button, but it had to be sturdy enough. After browsing online, I discovered some big metallic buttons on AliExpress which where ideal.
As for the battery, I ordered a LiPo shim for Pico and a durable Galleo 400mAh Hard case battery pack from Pimoroni.
Now that I had all the necessary components, I could begin creating my first prototype.
Prototyping
Initially, my Proof of Concept was relatively straightforward. I placed a large button on the top, an on/off switch on one side, and an LED indicator on the other side. Using my laser cutter, I quickly fabricated a case, which was more practical than my breadboard prototype, especially when it came to pressing buttons.
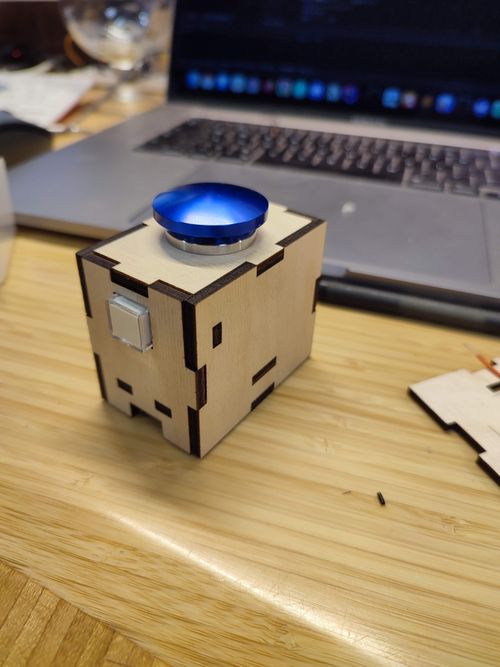
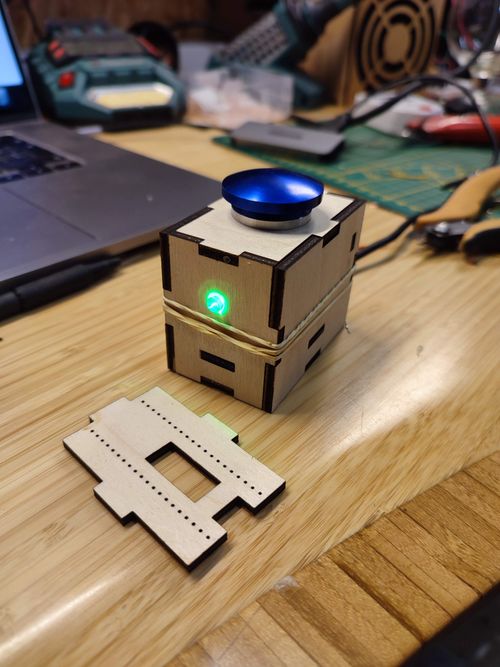
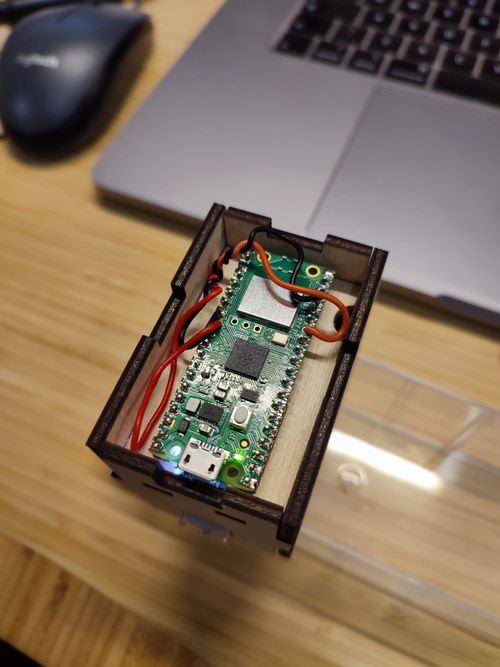
To establish the connection, I began with a standard HTTP connection between the server and the Pod.
On the Pico, I utilized a basic web server that communicated with a REST API I developed in Node.
Setting up a web server on the Pico is incredibly simple, and there are numerous libraries and helpful tutorials available on the topic. You can find a link below for reference.
I encountered a major issue early on—I needed to run multiple tasks simultaneously. This was something I hadn't done before in MicroPython.
The web server ran on the main thread, which made it inconvenient to listen for button presses simultaneously.
Moreover, the web server had to function bidirectionally. It had to listen for an activation event, then wait for a button press, and finally send the button press to the external server.
After delving into Asyncio and gaining knowledge about multitasking, I made some progress. However, I wasn't entirely satisfied with the outcome. Although it was functional, the code lacked flexibility and proved challenging to modify and maintain.
Since it was finally a functional prototype, I could start working on a case.
The pod case
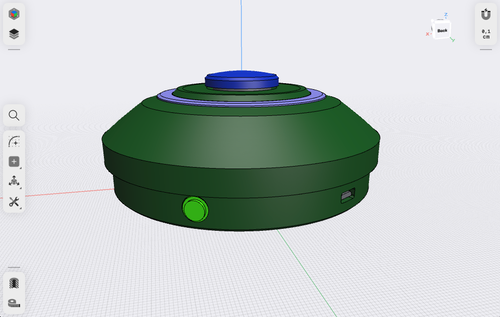
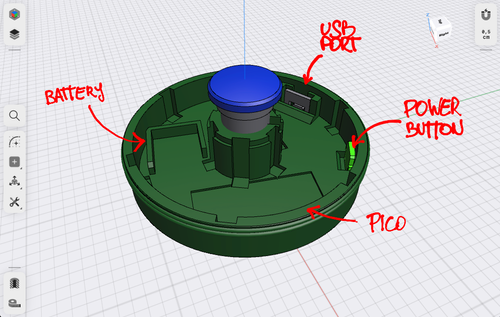
I used Shapr3D, my preferred 3D CAD designer on iPad, to create the case.
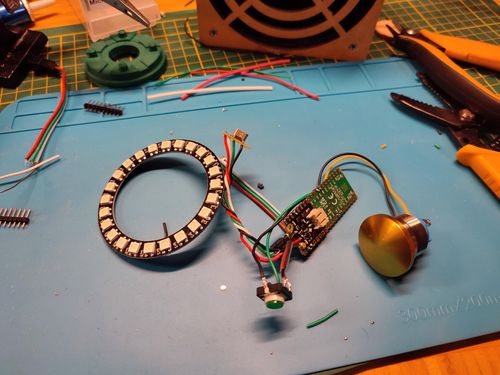
The initial lasercut prototype was somewhat bulky and purely functional. I wanted the Pod to resemble a large button, something that would entice users to press it. As a result, I centered the design around the prominent button. While developing the case, I also had the idea to incorporate an LED ring into the design. This would attract much more attention compared to just a single LED. The LED ring would encircle the button at the top of the Pod.
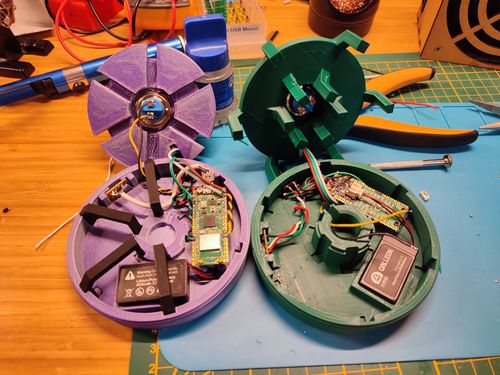
The remaining components were strategically positioned around the button, which was already positioned quite high. I also prioritized safeguarding the Pico and, in particular, the battery pack from any accidental damage in the event of a case breakage. Therefore, it would be wise to avoid placing any components directly beneath the button.
Additionally, it was crucial to ensure easy access to all the components during assembly and maintenance. To achieve this, I made the top lid screwable.
The electronics
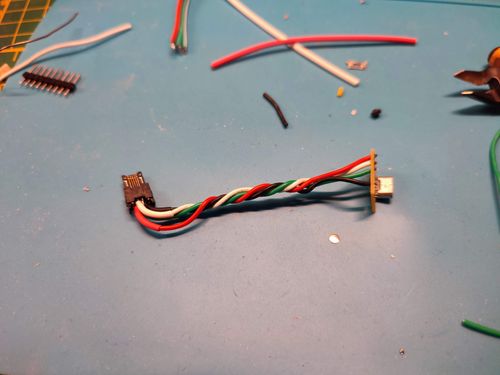
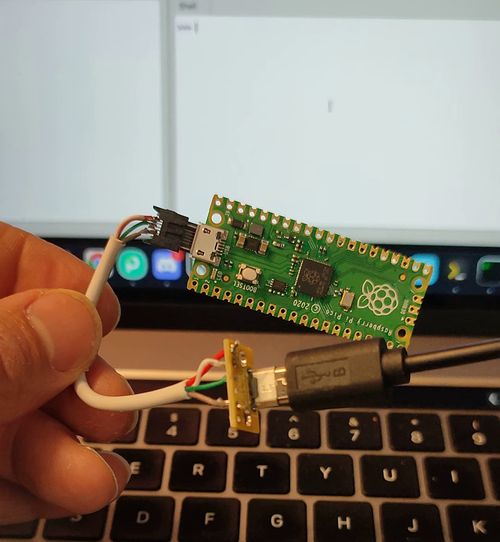
As it was challenging to provide external access to the USB connection of the Pico, I incorporated a USB breakout into the design. Since there wasn't much space available for a USB cable from the Pico to the breakout, I ordered bare USB connectors and painstakingly soldered my own cables to them, which proved to be quite a hassle.
To fulfill the need for a power switch, I discovered aesthetically pleasing switches with built-in LEDs. These switches were ideal for indicating whether the Pico was powered on or connected to the internet.
Putting it together
After several test prints, I finally achieved a satisfactory case. This marked the completion of Pod Version 0.2!!!
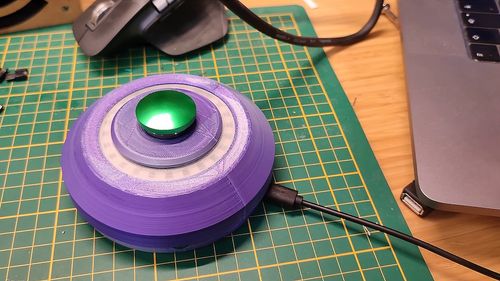
Now that I had two pods to use for testing—the early prototype (v0.1) and the 3D printed version (v0.2)—I could further develop the code.
The app
The server still relied on a series of REST API calls, so I began working on an interface that could log the results from the QuickReact sessions.
For the web application, I utilized Remix, a React framework. To design the user interface, I employed DaisyUI, a Tailwind CSS framework.
In the app you can add users and use those users to start a session.
At this moment there are 2 modes, tap as much pods in a limited time and tap as much pods as fast as possible.
Every time a pod is activated, the corresponding button will light up on the screen. The moment the user taps the pod the button is deactivated and another one lights up until time is up or the amount of taps is reached.
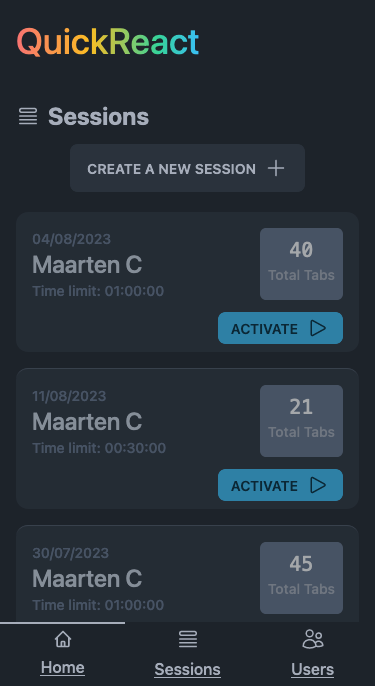
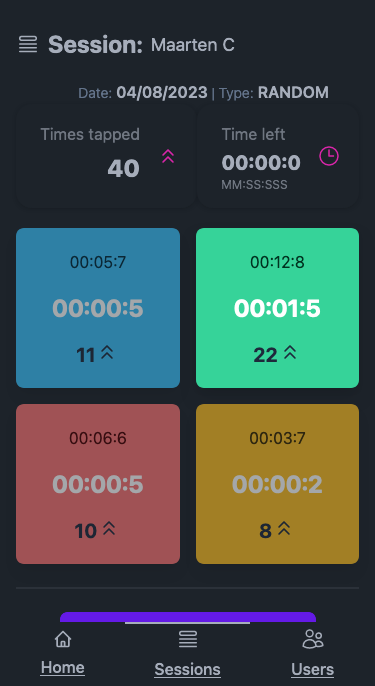
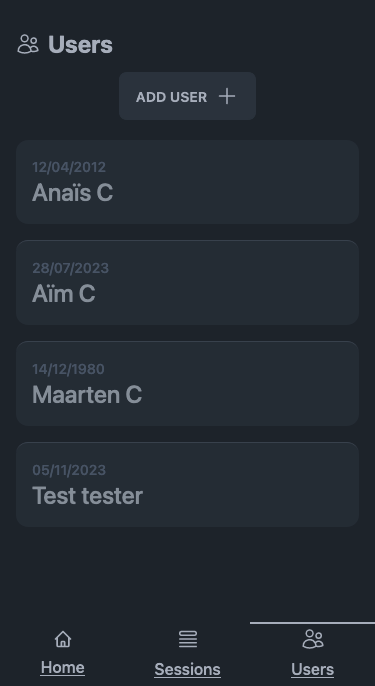
Assemble all pods
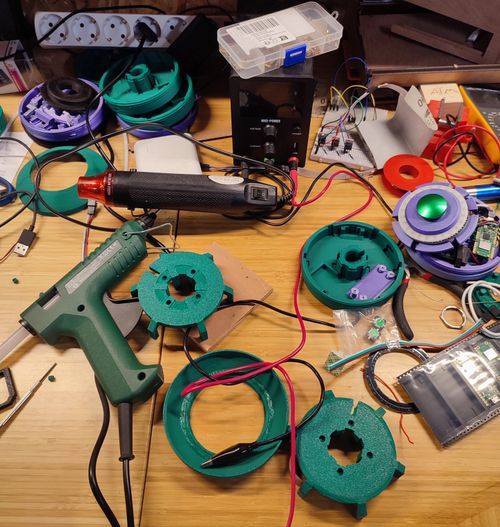
At the same time I did a couple of more iterations on the case until I got rid of all the issues I encountered when working with the v0.2 case. Once I was happy with the final result I started assembling all the other pods.
From the beginning, the plan was to have four pods in each session. Luckily the components where pretty easy to solder, except for that tiny USB cable.
First test
The project was taking shape. With the four pods in hand, my test team consisted of my two kids, and we had already begun competing at home to see who could hit the most pods in the shortest amount of time. Concurrently, I was addressing bugs and intermittently working on the UI of the web application.
As the moment to showcase my project to external parties drew near, I couldn't help but feel a surge of excitement.
However, I soon realized that I had overlooked a crucial aspect.
The issue
My pods were solely communicating within my home network, where the web application was also hosted. But if I were to move the web application to an online server, the bidirectional communication over HTTP would no longer be feasible. 🤦♂️
I felt foolish for not considering this earlier, as it is quite logical in hindsight.
Throughout the development process, as I worked with the HTTP server solution, I had the idea of a real-time socket connection in mind. This was because the HTTP requests were not consistently real-time. Recognizing that a quick solution was necessary, I opted to implement MQTT due to the abundance of information available on using MQTT for MicroPython. The concept of establishing an active connection between the pod and my MQTT broker seemed ideal for my needs. Initially, there was a drawback as it required rewriting everything on the Pod. However, I quickly realized that transitioning to MQTT significantly simplified my code and resolved most of the multitasking issues.
Although I lacked hands-on experience with MQTT, I managed to quickly adapt the code.
The result was so much better.
The Pods now connect to a mobile phone hotspot, which is almost always connected to the internet. As soon as they establish a connection, they contact the broker. From that point onward, I can activate and deactivate them through the web application, which is also connected to the broker. Now, I have much greater control over the status of the pods, and the connection is far more stable compared to using HTTP. Best of all, I can utilize it anywhere outside my home network, as long as my phone has a mobile connection.
The final result
At last, the pods are complete and working perfectly. Despite requiring more effort than originally anticipated, the development process went fairly smoothly with no major hiccups.
The pods offer immense fun, whether competing against one another or trying to surpass your own high score. While I have additional plans for enhancements in the future, I'm currently quite pleased with how they've turned out.
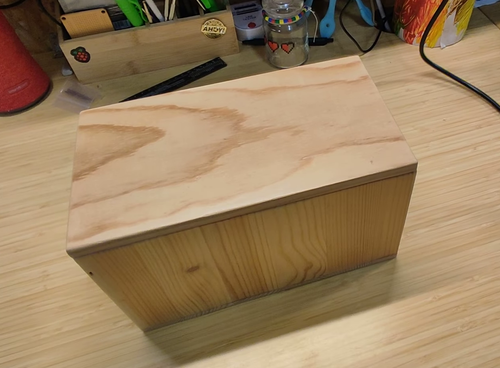
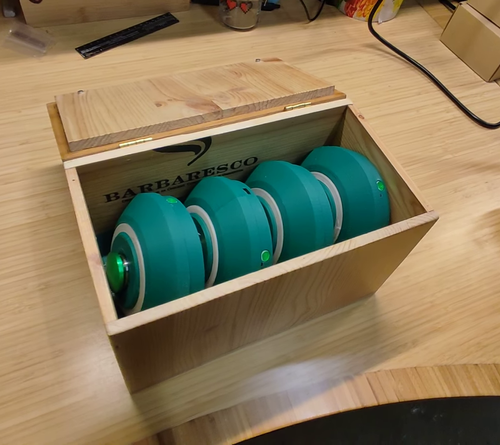
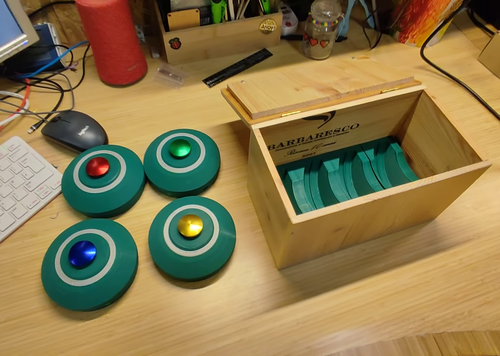
I also noticed that transporting all four pods simultaneously posed a challenge, so to simplify this task, I crafted a wooden case from a wine crate which can comfortably accommodate all of them.
Future improvements
After utilizing the pods for some time, I noticed that the MQTT connection is not consistently real-time either. Occasionally, there are delays of a few seconds that I need to address.
I have many more ideas to add more gameplay modes.
Additionally, I have always been keen on exploring and learning about PCB design. Perhaps this project could serve as an ideal initial test case for me.
Links
How to create a MicroPython Web Server the easy way!
This post will show how to create a MicroPython web server that uses the MicroDot framework and show how easy it is to use.
https://www.donskytech.com/how-to-create-a-micropython-web-server-the-easy-way/

Getting Started with Asyncio in MicroPython (Raspberry Pi Pico)
px-captcha
https://www.digikey.be/en/maker/projects/getting-started-with-asyncio-in-micropython-raspberry-pi-pico/110b4243a2f544b6af60411a85f0437c